

It was an exhausting and successful weekend of art fair goodness, from which it has taken me three full days to recover. Bugger being an introvert - I can meet and greet and chat all day with people as well as anyone else, but when it's all over a recharge is not enough - I need a brand new battery!
Despite the tiringness, it was wonderful to meet so many people, to see people's reactions to the artwork and the cookbook concept (overwhelmingly postive) and to meet a bunch of likeminded local creatives.
Below are my photos from the event, previously published on FB.
Another roundup, including loads more photos of the event (and not written by me!) over at the Ballarat Independent: http://theballaratindependent.com.au/news/article/nanna-technology-and-artisan-craft-a-fine-mix
"Ballarat's talented artists and artisans were once again a feature over the weekend at the second Ballarat Artisan Festival. A wonderfully diverse array of work was on show with contemporary and traditional artworks, shoemaking, glass works, sculpture, cartooning, textiles and several other crafts... "
 |
| All set up and in the swing of the fair. |
 |
| A little bit of live painting is more interesting for everyone. |
 |
| Early in the setup before the framed paintings started walking off the walls. |
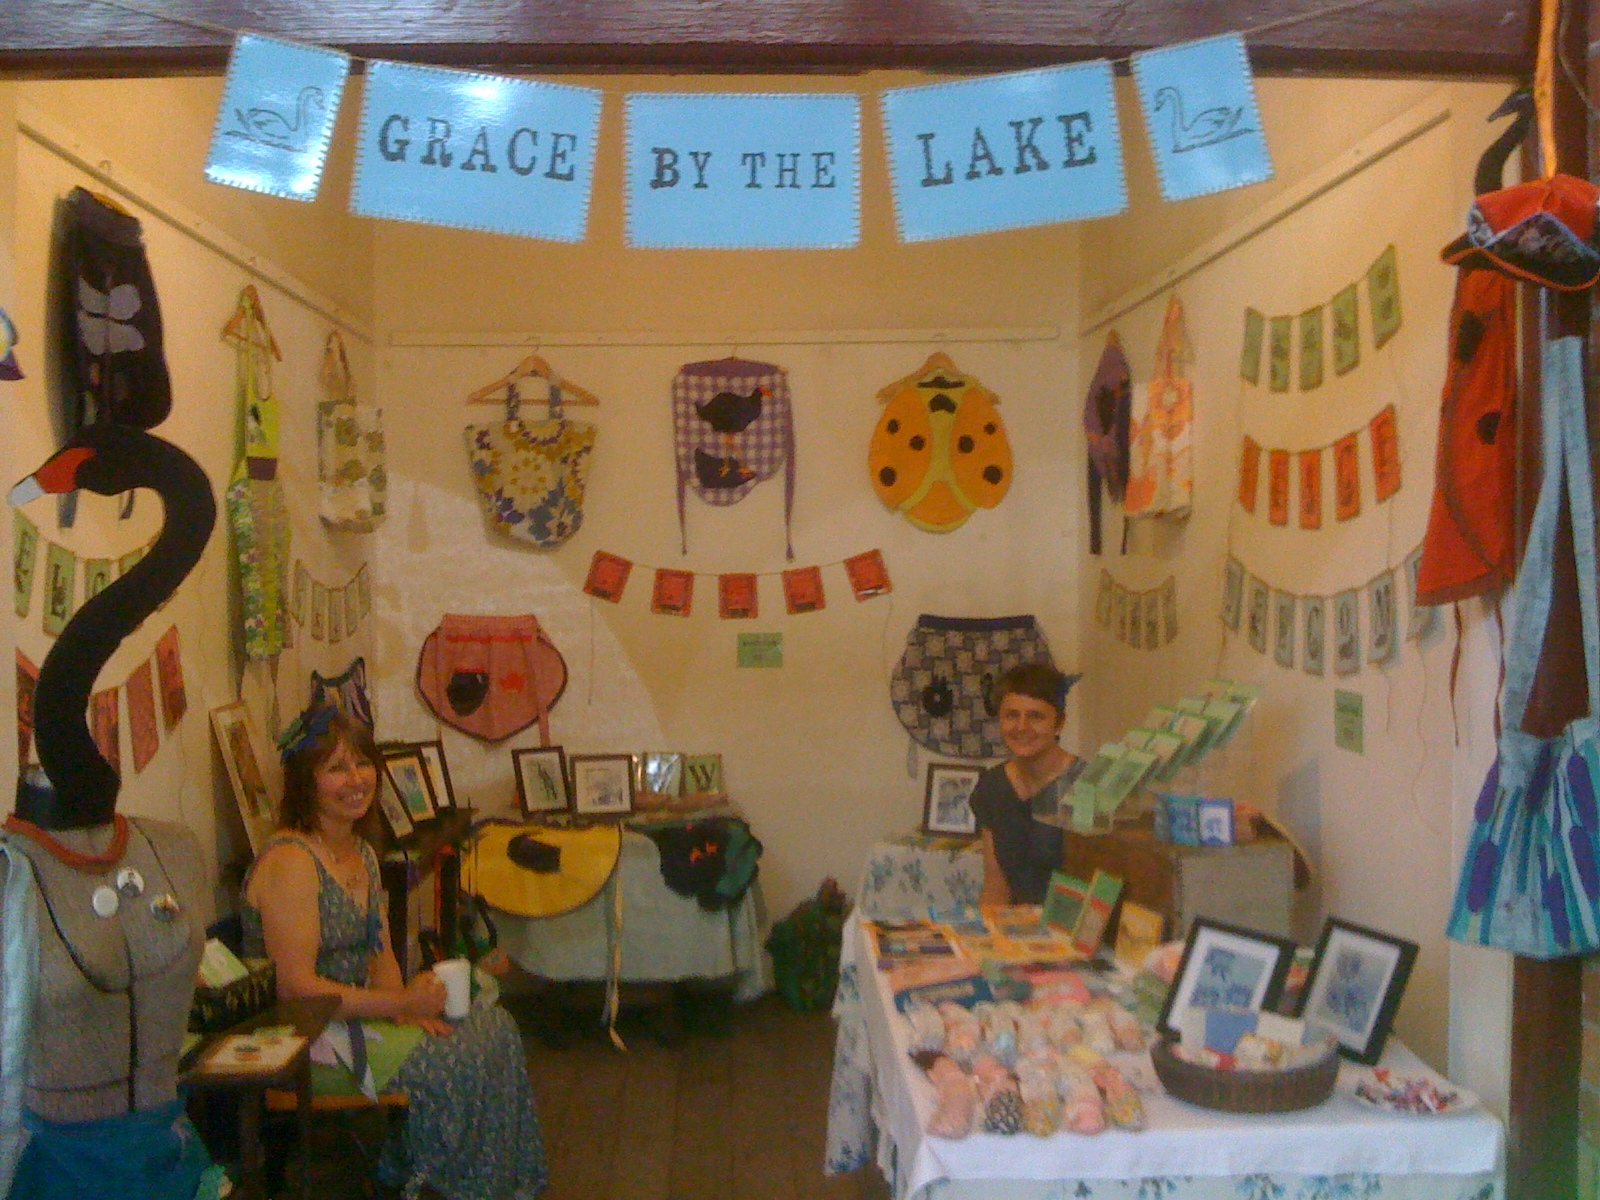 |
| The crafty goodness of Grace By the Lake. |
 |
| Jenny and Caron, of Grace By the Lake - very friendly faces. |
 |
| Linda of South Street Art Studio with her meditation inspired works. |
 |
| Linda runs both art and meditation classes at South Street Art Studio. She's a very supportive personality. |
 |
| Christine Hickson, whom I was introduced to by several sets of people. Obviously we were meant to meet! |
 |
| The exquisite watercolours of Christine Hickson. She needs an Etsy store as her work is gorgeous & people were loving it. |
 |
| Pauline O'Shannessy-dowling with her intricate and wonderful works. |
 |
| One of these large intruiging abstractish pieces is a prizewinner. |
 |
| Set up of my stall in progress for the Ballarat Artisan Fair |
Today has been consumed with the set up of my stall at the Ballarat Artisan Fair. This is the first time I've prepared for an art fair. It's taken several weeks to get everything together, from varnishing all the (70+) paintings, to sourcing gift bags (that never arrived!) to printing promotional material. Below is a list of everything I've been able to think of to take along or have prepared. I'll append it afterwards as there are bound to be new insights gained from participating in the event.
Table
- Trestle table or two
- Many markets require a white table cover, so get a white sheet or two, or something nicer such as velvet (not velveteen as it looks cheap) or satin or canvas
- Large butterfly clips for clipping tablecloth to table, and gaffa tape the same colour as the table cover for hiding the clips
- Clamps for backup clipping tablecloth to table
- A bucket or box as a bin for under your table is rather handy
Promotional material
- Business name banner with rope & eyelets and gaffa tape for hanging options
- Business cards
- Email list signup sheet on clipboard (essential!!)
- Pens for signup sheet, attached by string
- Postcards of artwork
- Photo books of artwork - show off more than you can bring on the day as interested people may ask for a commission based on what they see you are capable of
- Photo board of artwork - lots of artwork to choose from on the day but too many paintings to display at once? Show photo samples of your full range. Individual artworks can be shown on request.
- Artist statement for display, possibly laminated
- Price tags, ready and blank (who knows what will happen on the day and how many you will need)
- Nice paper to print out price tags and artist statement and any other small signage
Displaying artwork
- Figure out the stall design and layout first
- Builders level for getting frames hung straight (so good)
- Wire/hooks/picture hooks (a roll of fencing wire, some pliers and tin snips are super handy to make hooks of any size or strength)
- Framing wire (make sure it's rated to cope with more than double the weight your work weighs)
- Fishing wire to make a washing line artwork display (useful for giftcards and other small lightweight works)
- Sinkers to weight down display wire to make it stay taught
- Small bulldog clips x 24 for hanging unframed artwork washing line style (these are super handy)
- Cotton gloves for handling artwork
- Frames, ready to hang
- Pliers - fat and thin
- Hammer
- Wirecutters (tinsnips are far more effective than the scissor part of pliers)
- Screwdrivers - an assortment
- Masking tape
- Scissors
- Gaffa tape / cloth tape in colours to match your display elements
- Blu-tack
- Double sided tape
- Backboard/screen on which to hang artwork
- Window cleaner and paper towels for cleaning the glass & frames - essential
Storing artwork
- Portable box storage system
- Glassine paper for unframed artwork
Looking after me
- Portable music
- Lunch - no heating required, not messy
- Snacks - nuts, fruit, quick, not messy
- Water - have two litres
- Coffee, tea, hot drink in thermos or hot water plus bags/containers, milk
- Camping chair or something to sit on, plus a cover to make this presentable
Selling artwork
- Change from bank for cash sales
- Cash storage - bumbag or tin or wallet
- Credit card payment facilities - if not provided, take a laptop with easy access to the Paypal site, laptop power supply, powerboard and extension cord
- Certificates of authenticity - ready to print (take printer, extension cord and spare ink) or already printed out in doubles and take carbon paper
- Clip board with attached pen for filling out the COA's - very handy
- Packaging for sold artwork - precut cardboard sleeves / boxes or gift bags and bubble wrap
- Phone, charged up
- Red dot stickers
- Paintings, varnished and framed
- Pencils
- Pens
- Notepads
- Packing tape
- Regular stickytape / sellotape
If you're an artist and have useful notes to add from your experiences of art fairs, please enlighten the rest of us in the comments.
More art technique articles
 This article is one in an ongoing series of technical articles for artists, all archived together and accessible from here. The topics range from details on materials, to the business of art, to specific art techniques. Please make use of this resource.
And remember to check out my artworks on Flickr, and have an insider peek at my life as an artist on Facebook.
 |
| Photo thanks to Seattle Municipal Archives |
As this blog has grown it has become more and more difficult to easily find these, which are published about once a month. This is a shame as these are often the most useful and popular posts. There is now a direct link to this page from all areas of my site, on the sidebar.
As part of my continuous learning I go in-depth on a topic that interests me at the time and write up what I have learned. For me this is a way of consolidating the knowledge for myself, putting it in one place that I can refer to again in the future, and sharing my findings. I am quite particular and go to some lengths to get the information right, so I trust it will be of good use to more people than just myself. Each article also contains links to the most useful resources I have found during my investigations.
This post is part of an annual blog feature over at The Altered Page called 'Buried Treasure'. There you will find links to unearth the top posts on many art blogs.
This post is part of an annual blog feature over at The Altered Page called 'Buried Treasure'. There you will find links to unearth the top posts on many art blogs.
Learn & enjoy and remember to check out my artworks on Flickr, and have an insider peek at my life as an artist on Facebook.
To use this page - First give the script that collects all the relevant posts a moment or two to load. It should be done by the time you get down to reading this sentence. If not, close your eyes, tap your heels together three times, and that should do the trick.
- There is a short preview of each post when you hover the cursor over the title.
- Titles are in alphabetical order, but you can click on the date column header, 'POST DATE', to sort in ascending or descending order.
- Click on a specific label (not the column header) to display only the posts tagged with that label ie. art techniques
- To go back to the full list, just click the column header, 'LABELS'.
If you want to do a plain search of this blog, use the Blogger search box which is at the very, very top of this page on the LHS, next to the B outlined in orange.
************

September 8 - October 20, 2011
6x6, a series of six, back to back, one week only art exhibitions in New York City starting Thursday September 8, 2011.
6x6 is an art version of a music festival highlighting a line-up of twelve international artists run by Baang and Burne Contemporary, an unconventional art gallery.
6x6, a series of six, back to back, one week only art exhibitions in New York City starting Thursday September 8, 2011.
6x6 is an art version of a music festival highlighting a line-up of twelve international artists run by Baang and Burne Contemporary, an unconventional art gallery.
Artists, if you're looking for a way forward in this new internet era, check out what Kesha Bruce and Charlie Grosso are up to.
Appreciators of art, if you might be interested in an alternative to traditional galleries, check these two out. It's all very excitement.
I interviewed Kesha who is a successful professional artist. She is thriving while controlling her own career and achieving this by making the most of the new possibilites now available thanks to the interwebs.
Read on to find out how she does it and why no art snobs are allowed...
People's perceptions of the art world is that it is a closed elitist club. The existence of the internet means that artists are no longer forced to go through the traditional gallery system which is so off-putting to many art viewers. This is a golden, once in a generation paradigm shift of opportunity for artists. From your personal experience, how are people finding your work given that you are not part of a conventional walk-in-off-the-street gallery?
First things first, let’s dispel a common misconception that a lot of artist have: Most galleries do NOT make their sales from walk-in-off- the-street sales. Instead sales are made based on relationships they have spent time building and nurturing with people who have expressed interest in their artists work. By the time someone decides they want to spend that amount of money, usually they have done their research, have been following the artist’s work, and have decided well in advance that they want to buy a piece.
Once you understand that you don’t need “foot traffic” to make sales, you can focus on what actually works. Building your mailing list and staying in touch with people who like your work. Most of the people who have bought my work recently are people who have met me through my blog. I had been in contact with some of them for years before they became “collectors” of my work.
You have 'no art snobs' written fairly prominently on your website. Why do you encourage regular people to get interested in and buy your artwork? Surely chasing known collectors and uber wealthy people would be a better strategy?
Actually, chasing down rich people would be a disastrous strategy and an enormous waste of time and energy! You might even get arrested for stalking.
I always tell my consulting clients: “Stop hunting Unicorns!” By that I mean--understand that most “art collectors” don’t walk around calling themselves “art collectors”. It’s not a job title. Most of them aren’t rich, or snobby, or well-known.
The people who consistently buy my work are normal people. They are nurses, hair stylists, car mechanics, and even supermarket cashiers. These people buy my work and keep my bills paid. This idea that “collectors” are these mythological creatures that must be hunted down is actually a very harmful one. It’s precisely that limiting belief that prevents them from seeing possible sales that are right in front of them.
Artists need to make a habit of consistently staying in touch my e-mail and by snail mail with every single person that has ever shown interest in their work. These people are your future collectors!
Traditional galleries have the reputation of being intimidating and sometimes even clinical environments regardless of whether they are commercial or artist run galleries. There are already artists running pop-up galleries and going the D.I.Y. route but your events are billed as creating real excitement and having the spirit of an indie rock band. That's an entirely different concept, pushing the D.I.Y event to another level again. I'm curious why you chose to push so far past the comfortingly familiar art event?
Does anybody really, truly enjoy austere and highbrow? Charlie Grosso and I based the creation of Baang and Burne and the line-up of artists and events for 6x6 on what we personally would love to attend. Art can be serious and fun at the same time (Fi's emphasis). 6x6 is exactly the type of art event I’ve been waiting to be invited to my entire life.
To learn more about 6x6, read Kesha’s weekly articles on art, art marketing, and creativity and to download a free copy of her guide “The 5 Step Art Career Make-Over” visit her blog at www.KeshaBrucestudio.com.
 |
| Image by by Incase |
So you've decided you'd like to begin your very own art collection? Or perhaps you're contemplating the idea? Here are some pointers to get your collection going in the right direction for your cashola and enjoyment. My other article, 'How do I know what art to buy?', gives pointers on choosing individual pieces of art.
First up, $500 a year is enough to begin a collection. Yes. So if you think you can't afford your own art collection you're probably wrong.
Secondly, a collection of related pieces of art is far more valuable than a random collection. You'll get more enjoyment out of becoming an expert on your chosen niche of the art world too. Don't be random. Choose a theme for your collection, it doesn't matter what it is as long as it's something you're interested in. Local artists or surreal artists, landscapes or cartoons, oil paintings or stencils, there are many ways that you could choose to do this. Remember, there is more financial and enjoyment value this way.
You might want to write down what your collecting theme is to help keep you on track for when you find art that you love that doesn't fit with your theme. Just a suggestion.
Thirdly, you also may want to take into consideration your living environment. In that, humid or coldly damp places and works on paper are not a good match (add insects and direct sunlight to that list), bronze sculptures are almost indestructable which is useful for bushfire zones, massive sized artworks don't fit in apartments and if you have a colourfully decorated home the art you choose may need to fit your home colour scheme. If you are worried about an artwork fitting in with a change in decor, remember that like a good piece of furniture, a good artwork will transfer just fine into a different residence.
Where to find the art you want and can afford.
The primary art market means buying direct from artists or via galleries representing an artist. This is the cheapest way to start your collection, with artist direct being the most hip pocket friendly. Generally, the less well known the artist, the lower the price of the work. You can find artists online, artists selling direct from their studio and artists selling via exhibitions in both commercial and artist run galleries. There will be publications in your area listing all the latest exhibitions. Visit and view. Get on the mailing lists of artists and galleries that you like so you find out about new works and shows first.
The secondary art market means buying from other art collectors. Usually an art dealer or gallery is involved. Art auctions are another form of the secondary market. If you are buying via auction, remember that there are cycles in fashionability in the art world. This affects auction prices significantly. What's not in fashion is cheaper to buy.
A couple of notes
An artwork with a signature on the front is more valuable than a similar piece with a signature hidden on the back or missing a signature altogether.
Oil on canvas has traditionally been seen to be the most valuable of art mediums, but this is changing with so many more materials available to artists and more knowledgable conservation techniques.
Go with what you love. You'll be looking at it for a long time.
More art technique articles
This article is one in an ongoing series of technical articles for artists, all archived together and accessible from here. The topics range from details on materials, to the business of art, to specific art techniques. Please make use of this resource.
And remember to check out my artworks on Flickr, and have an insider peek at my life as an artist on Facebook.
 |
| Photo by Arty Smokes |
What you will need
- Your dry artwork, unvarnished
- A bright overcast day - yes outdoors in diffuse sunlight is actually the best solution to photographing shiny oil paintings if you don't have a studio setup
- A camera, preferably digital (does anyone even use film cameras any more?) and even better, DSLR - check that the megapixel capability of your camera is sufficient for the size of print that you may want for your records. Here is a useful megapixel to print size chart
- A good camera lens without any distortion or vignetting
- A polarizing filter for your camera lens - this is to cut out glare from highlights
- A tripod
- A grey card - this will make your colour correcting a breeze (yes this is an affiliate link)
- A sturdy support for your painting
- A dark piece of cloth or paper - this is to minimise or prevent a colour cast from the surroundings
The photography setup
Wait until your painting dries.
You will get the best photos of dry or nearly dry oil paintings. If the oil is still wet, it will shine in areas and the oil remaining in the painting will reflect light differently than the dry areas of the painting.
Go outside on a bright overcast day.
This is crucial. I've tried bright sun. I've tried shade. I've tried bright days and dull days and I swear every combination in between. I can say from experience that the best conditions to get beautiful rich colour and no glare on your painting is a bright overcast day. What's that? Basically a sunny day with lots of clouds. Colours around you should appear normal, not dull. Shadows should not exist or if they do they have soft edges. Once the edges of the shadows turn hard, it's too bright and you will get glare spots on your paintings.
This is crucial. I've tried bright sun. I've tried shade. I've tried bright days and dull days and I swear every combination in between. I can say from experience that the best conditions to get beautiful rich colour and no glare on your painting is a bright overcast day. What's that? Basically a sunny day with lots of clouds. Colours around you should appear normal, not dull. Shadows should not exist or if they do they have soft edges. Once the edges of the shadows turn hard, it's too bright and you will get glare spots on your paintings.
Position the painting at 45 degrees to the sky, facing the sun (ie north here in Australia, or south for most everyone else).
I think both perfectly upright and laying flat on the ground also work too, but this is the setup I found was ideal for me. Place a sturdy support (helps eliminate shake from small and not so small breezes) at 45 degrees to the sky, cover with a black cloth to reduce color interference, and put the painting on this.
Point the camera straight at the painting.
Fill the camera view with the painting as much as possible. Use every pixel possible! Remember to tilt the camera slightly down to match the angle that the artwork is leaning - this will help minimize distortion. Check in the viewfinder to see if all the sides of your painting are parallel to the viewing edge. If not, your camera is at a different angle than the painting. Fiddle until you get this right. Also, remember to set the tripod up so that your shadow is not on the painting as you stand over it!
Trouble with your artwork looking like a big bulge?
That’s to do with the lens. Use the zoom on your camera to zoom in until the bulge effect disappears and the painting edges are parallel with the viewing edges, while simultaneously backing away from your artwork so it fits the viewing space. Or use a standard 50mm lens.
That’s to do with the lens. Use the zoom on your camera to zoom in until the bulge effect disappears and the painting edges are parallel with the viewing edges, while simultaneously backing away from your artwork so it fits the viewing space. Or use a standard 50mm lens.
Camera tips
- Use the largest image setting possible for your camera to get the highest resolution images
- Set your camera's ISO to its lowest native setting to ensure the least amount of image 'noise' - aim for 50 ISO
- If you can, lock the SLR mirror up as this will reduce camera shake as the shutter fires
- Use a self timer if you can to eliminate any camera shake as you press the shutter button
- Always bracket exposures - huh? Take shots slightly on either side of what your camera says is the ideal exposure as it's not always right for each picture
- Don't rely on auto focus to get it right, sometimes a small manual tweak does the trick
Shooting
Shoot the grey card first.
This is to get a standard for the lighting and will make your colour correcting easy peasy. Then shoot your paintings. Try and have some of the grey card in the shot, to the side of the painting too.
This is to get a standard for the lighting and will make your colour correcting easy peasy. Then shoot your paintings. Try and have some of the grey card in the shot, to the side of the painting too.
Post processing in your digital darkroom, aka Photoshop
Once your shots are off your camera and on your computer, compare them at full size for colour, focus/blur, contrast etc to choose the best one.
If none of the images are quite right, take the time to re-shoot your painting. This is your archive. It's worth getting right. Once the paintings have gone to their new homes it's next to impossible to borrow them back to re-shoot them.
With editing, often you will find that a small increase in contrast is all they need. Sometimes a small amount of colour correcting can go a long way, too. This is where that grey card shot comes in extremely handy. I'm not going to reinvent the wheel - download this free and super helpful kick ass pdf by one Michael King on how to use a grey card to colour correct artwork.
Always save your images as tiff or psd for maximum information retention. Only save them as a jpeg for emailing once all edits have been done as the jpg format is so small because it throws out fine detail information. Always keep a tiff or psd version somewhere so you can archive your image without any loss of information and re-edit in the future.
Useful links to peruse
More art technique articles
This article is one in an ongoing series of technical articles for artists, all archived together and accessible from here. The topics range from details on materials, to the business of art, to specific art techniques. Please make use of this resource.
And remember to check out my artworks on Flickr, and have an insider peek at my life as an artist on Facebook.
 |
| Photo courtesy of patrizia_ferri |
As the final installment of my investigations into artist's canvas, this time I'm looking at canvas keys, gallery wrapped canvas vs traditional profile canvas and the idea of unstretched canvas.
Previous related posts cover all about painting substrates, all about the types of artists canvas and stretching your own canvas.
Canvas Keys
Some stretched canvasses come with little wooden wedges. What are these for? They are known as canvas keys. They should fit into slots in the inner corners of the canvas stretcher. They are a traditional method for tightening up a canvas that has begun to sag. Unfortunately, they are not a very good method for doing this. Any canvas that has developed a sag should be carefully taken off it's stretcher and re-stretched.
Using canvas keys to take the sag out of a painting risks damaging the painting. It is possible to accidentally hammer the back of the painting if the keys are missed, breaking the paint. Using keys puts a great deal of stress on the corners of a painting which can eventually tear the canvas. The keys will invariably change the shape of the stretcher and it will no longer be square and the painting may no longer fit into it's frame, if it had one.
Skip the dodgy canvas keys. Traditional, but not very smart. Take the canvas off the stretcher altogether and re-stretch it!
This video explains the same information in visual form:
http://www.youtube.com/watch?v=tSLhkuFO3G0
Bracing a Stretched Canvas
A canvas stretcher or strainer is under quite a bit of tension once a canvas has been secured onto it. They are usually made from timber and so are prone to warping under tension and changing atmospheric conditions. It is recommended that they include a cross-bar every 60 cm (or 2 feet) or so in each direction to help prevent any warping.
Traditional Stretched Canvas
A traditional stretched canvas requires framing. The tacks or staples show on the sides of the finished piece. Traditional canvases also tend to have a shallow profile. They are usually only about half an inch thick from the back of the canvas to the front.
Gallery Wrapped Canvas
This is a very modern style of stretching canvas. The canvas is wrapped around two edges of the stretcher bars and secured at the back where the staples or tacks can't show. Often the sides are painted. No visible staples or nails means a neat finish is achieved and no framing is required. Usually this style has quite a deep profile, more than an inch thick from the back of the canvas to the front, though they can also be shallow. The deep profile is the current trend.
Artists love gallery wrapped canvas as their artworks are ready to hang as soon as the varnish is dry. Many art collectors prefer it too as it allows them to skip the often substantial costs of framing. Anecdotally, gallery wrapped canvasses nearly put many framers out of business when it first came out as so many people suddenly didn't require their services. Though if you prefer your art in a frame, as some do, gallery wrapped canvas can be framed if you want.
Artists love gallery wrapped canvas as their artworks are ready to hang as soon as the varnish is dry. Many art collectors prefer it too as it allows them to skip the often substantial costs of framing. Anecdotally, gallery wrapped canvasses nearly put many framers out of business when it first came out as so many people suddenly didn't require their services. Though if you prefer your art in a frame, as some do, gallery wrapped canvas can be framed if you want.
Unstretched Canvas
It was a revelation to me when I was introduced to the idea of working on unstretched canvas. I was at the exhibition opening of a local artist who had oil pastel paintings on massive canvasses about 1 x 2 m. They were unstretched and looked wonderful.
Depending on your point of view, unstretched canvas is either fabulous or awful to paint on. It has a very different working feel to the drum-like bounce of a stretched canvas. To me it's wonderful and predictable. The give in the surface of a stretched canvas is something I find disconcerting. Different artists, different preferences. I guess it's like working on fabric textured board or paper.
For the artist there are some significant advantages to working on canvas unstretched. There are time savings as no pre-stretching is required. There are financial savings as no stretchers need to be bought. There are space savings as unused canvas can be stored rolled and once painted, can be stacked flat. Believe me, plain canvas takes up a LOT less room than a stack of stretched canvasses. And lastly, unstretched canvas is cheaper to post for a buyer as it weighs less.
For the art collector, unstretched canvas can be presented in a number of already familiar ways. It can be lightly stretched onto stretchers/strainers and ends up looking just like regular stretched canvas. Or it can be framed just like any paper artwork. For extra rigidity, it can be mounted (glued) to board before framing. All very normal procedures for your framer.
The only downside to unstretched canvas that I can see is that someone needs to frame it.
More art technique articles
This article is one in an ongoing series of technical articles for artists, all archived together and accessible from here. The topics range from details on materials, to the business of art, to specific art techniques. Please make use of this resource.
And remember to check out my artworks on Flickr, and have an insider peek at my life as an artist on Facebook.
 |
| Photo courtesy of Anita Thomhave Simonsen |
Stretching canvas. All you need to know in one place. Why would you? What do you need? How is it done? (with a selection of curated videos).
Why would you?
Artists are always looking for ways to save money on materials without skimping on quality. Stretching your own canvas instead of buying it already stretched is a real dollar saver. It also allows an artist to have full control over the canvas they paint on and how it is prepared, and to have any size they choose. So not only can it be cheaper, but better quality too!
However, before getting outlandishly excited, stretching canvas does take time, so if you're not quick at it, perhaps buying ready-mades would be less expensive in the long run. There is also the option of having canvas stretched for you by professionals. Obviously this costs though you get the exact specifications you want and can focus on painting, which is presumably what you do best.
What do you need?
- Stretcher bars, either pre or home made, to stretch your canvas onto
- Canvas to stretch, which is about 2 inches larger all round than the stretcher size
- Canvas pliers are useful to save your hands
- A staple gun and staples, or nails or tacks and a hammer for securing the canvas to the stretcher
- A mallet for tapping the stretcher together
- Tape measure for checking the squareness of the corners
- T square for chiecking the squareness of the corners
- Scissors for cutting the canvas
- A razor blade can be handy for removing excess off the edges
- Blunt nose pliers or a flat head screwdriver for removing errant staples
- Misting spray in case the canvas ends up too loose
- Patience
How is it done?
Rather than write up a long winded explanation, I instead sought out a bunch of the most useful videos. There are an awful lot out there and most of them are awful! I've sat through as many as I could stand (about 20) to bring you the pick of the bunch.
A good general introduction
This is a 5 minute video which deals with stretching up to about the 2 minute mark has some neat tips with razor blades and misting sprays.
Gallery wrapping of pre-painted canvas
A leisurely series on making stretcher bars and stretching canvas with plenty of handy tips
More art technique articles
This article is one in an ongoing series of technical articles for artists, all archived together and accessible from here. The topics range from details on materials, to the business of art, to specific art techniques. Please make use of this resource.
And remember to check out my artworks on Flickr, and have an insider peek at my life as an artist on Facebook.
 I remember when photocopiers became available for public use. There seemed to suddenly be a big hoopla about copyright. Suddenly there were going to be hordes of people photocopying entire books and reselling them. Schoolkids had to 'watch out' or else they'd get caught photocopying sections of books for studying, homework and school projects. And then sense prevailed and the concept of fair use caught on. Who on earth would photocopy an entire book anyway? It would usually cost more than buying it new and the quality would be rubbish.
There were tapes and then CD's. You weren't meant to copy using these either, but everyone did. And as long as it was for your own personal use and you weren't out selling the copies you made, no one knew or cared. Often you'd copy some music from a friend, take it home, listen to it over and over, and end up at the concert, buy a T shirt and some other albums and hey presto, the band has a new fan.
And now we have the internet which is a giant copying machine on steroids. I admit, it is insanely easy to get hold of anything you want online. But the paranoia over copyright is coked up and suffering hysteria. It's as if a revelation has occurred. People copy other people's work. Shit!
Why are people so paranoid over people copying their work? I mean, I totally understand being pissed at someone for sneakily copying and then profiting from your work. These slimy unimaginative rock dwellers deserve to be tied down and eaten alive by rats. Get your own damn thing to sell. FFS get permission to use someone else's work to generate cash.
But why is so little distinction made between sharing a creative piece with friends as a fan, spreading your obvious enthusiasm and respect for the work and artist to other people who you think will also be appreciative, versus slyly making money from someone else's creativity? I don't get it. Once it's in the world, it'll be copied. Fact. But there is a universe between these two scenarios.
And it appears that I'm not alone in these views.
Creative Commons has been put together for creators who want a middle ground between all rights reserved copy-any-of-this-and-you-die full draconian copyright, and nothing at all. Think of Creative Commons as 'some rights reserved'. It is a licence based on copyright that allows works to be legally available for sharing, on certain conditions.
My conditions are: http://www.wherefishsing.com/contactprivacy.html
I hold all the commercial rights to any work I produce, including royalties. So if you want to make a buck from my creative output, contact me. We may be able to set up a deal. But if I say no and/or catch someone deviously profiteering from my work, I'll first set the fleas from a thousand camels on their eyeballs, and then have my lawyers suck the financial life from them.
Otherwise (a la NIN),
please post it on your blog,
share it with your friends,
publish it in your zine,
include it in your video,
etc.
And some final thoughts by Cory Doctorow:
"My fans’ tireless evangelism for my work doesn’t just sell books — it sells me.
This is why I give away digital copies of my books and make money on the printed editions: I’m not going to stop people from copying the electronic editions, so I might as well treat them as an enticement to buy the printed objects.
Most people who download the book don’t end up buying it, but they wouldn’t have bought it in any event, so I haven’t lost any sales, I’ve just won an audience. A tiny minority of downloaders treat the free ebook as a substitute for the printed book — those are the lost sales. But a much larger minority treat the ebook as an enticement to buy the printed book. They’re gained sales. As long as gained sales outnumber lost sales, I’m ahead of the game."
A Bunch of Useful Links

This work by Fiona Morgan of WhereFishSing.com is licensed under a Creative Commons Attribution-Noncommercial-Share Alike 2.5 Australia License.
More art technique articles
This article is one in an ongoing series of technical articles for artists, all archived together and accessible from here. The topics range from details on materials, to the business of art, to specific art techniques. Please make use of this resource.
And remember to check out my artworks on Flickr, and have an insider peek at my life as an artist on Facebook.


